Showing posts with label Bella Boulevard. Show all posts

Monday, December 9, 2013

Another Disney Project

I feel as if all I scrapbook lately is Disney, Disney, Disney.  Granted, I have been to the World that I love FIVE times in the last eight years, and haven't completed a single album of a trip yet!  I did something a little bit different this time and have just been printing my Disney photos out a day of the trip at a time.  So, as of right now, I only have 2 days printed.  I'm working on lots of layouts of Animal Kingdom and Hollywood Studios!

We just happened to catch Sully heading to the backstage area after visiting with some of his fans at Disney Hollywood Studios.  We didn't get to chat with him, but I did grab this snapshot!

I didn't go as embellishment crazy on this layout as I normally do lately.  I just didn't feel like it needed it (maybe no layout really NEEDS it, but I do enjoy layering on the gizmos so) because the title really takes a lot of focus due to the design of the Thickers Alpha I used.

It Was a Drive-By Sully-ing


Supplies:  patterned paper - Basic Grey, Bella Boulevard, Studio Calico; arrow stickers - Studio Calico; flair - October Afternoon; enamel dots - My Mind's Eye; geotag sticker - Skipping5; letter stickers - American Crafts, October Afternoon; pull tag - American Crafts (Amy Tangerine line)

More Disney layouts, some Christmas, and hopefully some December Daily coming soon!  Thanks for stopping by!  

Tuesday, April 9, 2013

Dear Lizzy

So last week I came to you with a layout featuring mostly Dear Lizzy's Lucky Charm line.  I seriously love this line.  I purchased most of it separately, but pieces of it keep popping up in various kits I've gotten. 

You Make My Heart Sing

 
I'm not a feather person.  I received a pack of the Bella Blvd feathers in this month's Scrapbook Circle kit and decided I needed to try to use it. So, I layered it in behind some of the paper layers.


I've been using my sewing machine a lot more frequently late, particularly over alphas and titles

 
I love anything paper-clippy added into my page.  I just got these yo-yo flower paper clips and have almost gone through the entire package already.
 
Supplies:  patterned paper - American Crafts (Dear Lizzy), Crate Paper, My Mind's Eye; paper clip and die cut card - American Crafts; feather - Bella Blvd; other - buttons, wood veneer frames, twine
 
Thanks for stopping by!

Friday, January 4, 2013

My 101st Post!

Wow...I can't believe I've surpassed the 100 mark.  I'm pretty impressed with myself, as one who lacks stick-to-it-iveness, I've done pretty well with this little blog of mine over the past year and handful of weeks! 

I have another new layout to share today.  This one I created from bits and pieces of different collections...leftovers of various Studio Calico kits and things from my stash.

One more thing I have to mention.  I have read lots of reviews of Persnickety Prints, so decided to get a bunch of my Instagram photos developed through them as I haven't been happy with the quality of the prints I have coming from my at home printer.  This is the first photo I've scrapped from that order, which I just received Wednesday.  And WOW...I am absolutely in love with the qualit of these prints.  They're fantastic and I will use them again and again.  The prices are reasonable, but even better than that, the shipping is sooooooo much more reasonably priced than say some of the other photo processors out there. 

You Make Me Laugh

I realized after I uploaded this layout that I had another recent layout about Lisa with the same title!  I guess I need help in the coming up with creative titles department.

 
I think I've mentioned before how much I adore the Darling Dear collection from Studio Calico.  The background paper from that collection was my jumping off point.  I knew I wanted lots of pops of color to balance out the neutrals in the photo as well as the black and white of the background.  These are my favorite kinds of layouts - crazy, messy, and full of color!

 
I've had the hardest time finding ways to use these stencil cards from Fancy Pants, but this came together pretty well.


Supplies:  patterned paper - Basic Grey, Echo Park, Fancy Pants, Lily Bee Design, October Afternoon, Studio Calico; stickers - Echo Park, October Afternoon; tapes - American Crafts, Bazzill, Freckled Fawn, October Afternoon; die cut card - Fancy Pants Designs; flair badge - Studio Calico; flag - October Afternoon; wood veneer - Freckled Fawn; button flower - Bella Boulevard; other - brads

Thanks for stopping by!  Have a great weekend!

Wednesday, November 14, 2012

My Love of Modern Family & Downton Abbey

One of my favorite shows on tv right now is Modern Family.  I absolutely adore that show.  And when a reference was made by one of the characters to the show Downton Abbey (probably my favorite show EVER), I immediately typed that little quote into the notes section of my IPhone.  Seriously. 

So as I was scrapping away one day and stumbled across this unscrapped picture of the sign leading into the now defunct Toontown at WDW, I decided to put that quote to good use and make it the title of my layout, despite the fact that Downtown Abbey and Modern Family have absolutely zero to do with the photograph, with WDW itself, or the overall layout (other than my reference to both!  hehe

It's Toontown, Not Toonton...

 
I love, love, love the Abroad collection from Studio Calico.  It is by far one of my favorite collections ever!  The background paper on this layout is from said collection and works so well here on so many levels.  It just makes me smile.  Otherwise, there is a broad mix of manus in this layout...some Pebbles, a little Bella Blvd, Echo Park, and of course, October Afternoon.

 
I honestly have no idea what manufacturer the arrow and circle stickers are from...but I feel like if I sit here staring at them long enough I'll figure it out.  I'm very tempted to say Echo Park.  If you have any ideas, please let me know in the comments!

 
Much, much layering of stickers and a little die cut from Jillibean Soup (Smiles Look Good On You).


Supplies:  patterned paper - Bella Boulevard, Crate Paper, Echo Park, October Afternoon, Pebbles, Studio Calico;   letter stickers - October Afternoon, Pebbles; vellum die cut - Studio Calico; stickers - Echo Park, October Afternoon; washi tape - Bazzill, Cosmo Cricket, Freckled Fawn; die cut - Jillibean Soup

Thank you so much for reading and commenting, everyone!  You really make my day!

Tuesday, August 21, 2012

Scraplift Tuesday


Hey everybody, I'm trying out a new feature called (as the title of this post suggests) "Scraplift Tuesday".  This will be when I share a layout I created based on another layout I have seen.

The first awesome layout I found in the Two Peas gallery was created by mmspiker.  Here's some linkage to her blog post about her layout, Cathedral Quilt.


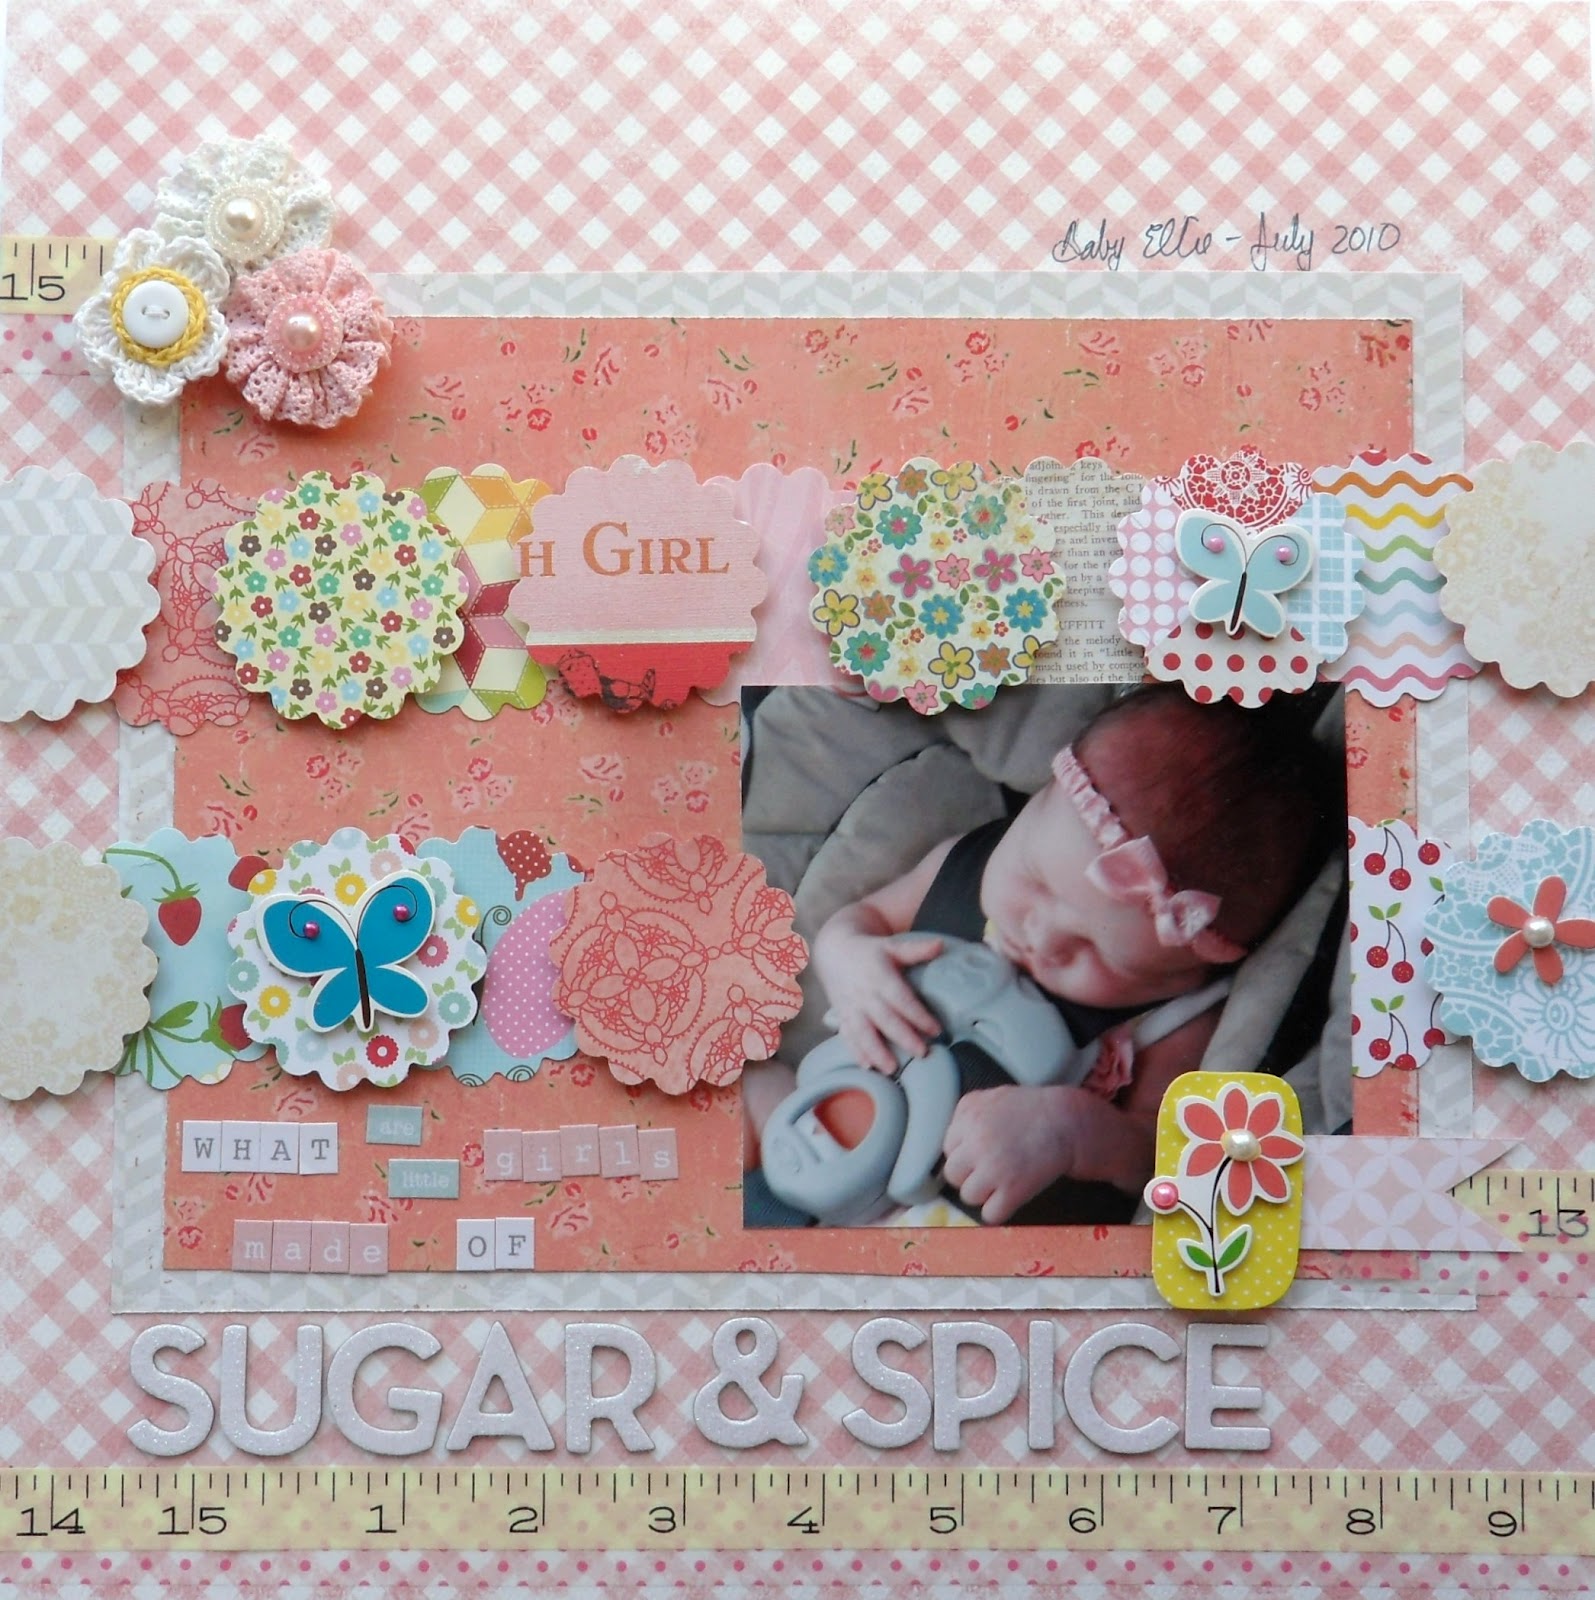
I love how she featured her photos on a paper quilt background.  I knew I wanted to somehow recreate that and ended up going with a number of overlapping scallopped circle punches and this is what I came up with:

Sugar & Spice


Thanks for reading!!

Thursday, August 9, 2012

Resizing Photos With Word

Hey everybody!  How's it going today?  I'm attempting a new feature here on the blog called "Tutorial Thursday".  That's right, every week on Thursday, I'll be bringing you a tutorial or page walk through or something of the sort. 

Today's tutorial is my first one ever, so please bear with me!

I do not have fancy photo editing software. So, when I want to shrink photos down for printing purposes, I make use of Microsoft Word! 

Firstly, I do not claim to be the end all know all of this process.  This is just works for me!  I started by choosing my six photos.  I picked six pictures from my niece's second birthday that I thought really highlighted the events of her party. 

The next part was a little tedious and if you have a better way of doing this, PLEASE share it with me!  The pictures had originally been taken with my digital camera.  Well, I'm pretty much obsessed with Instagram and wanted to use one of their filters on these pictures.  First, I cropped each picture down so it was roughly square shaped.  Next, I emailed the photos to myself.  Then I opened them on my email via my IPhone.  I saved each photo on my phone, then went to Instagram where I opened them back up and applied the filters before taking them and saving them from my phone and back onto my computer.  A bit ridiculous, but I liked the effect I got.  And I do realize I could probably accomplish the same thing with a good photo editing program, so if you know of any that are great and FREE, please pass them along!
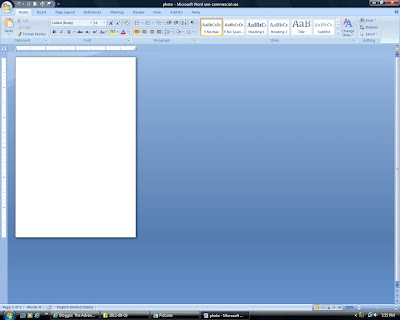


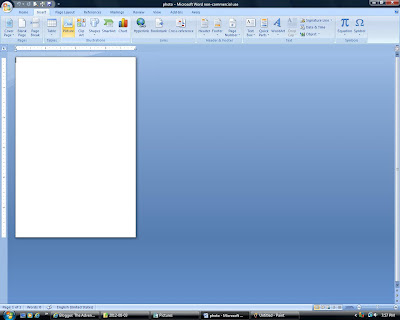
Once I had my photos saved back to my computer, I opened up Microsoft Word. I have a dummy file saved there that I've titled "Photo" and all it is is a blank 4x6 page.


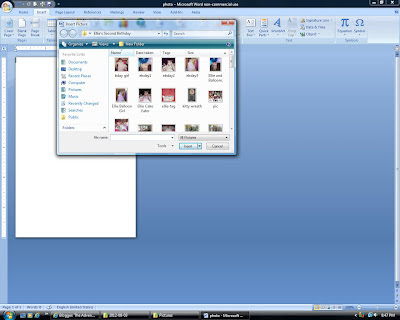
I wanted to print these photos together on one 4x6 sheet. To do this, I clicked the "Insert" tab, then picture.


This will bring up the file box (I'm not sure that's the actual name of it, but that's what I like to call it!) Here you choose your first picture


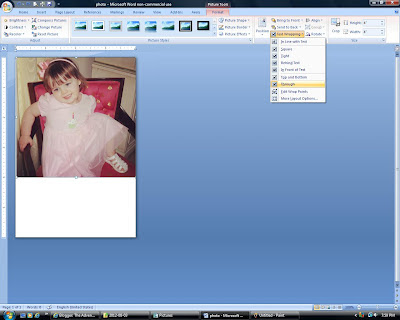
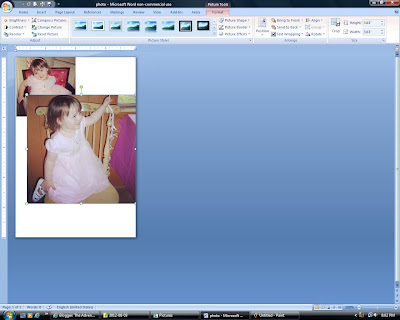
Once you have your picture, you're going to want to be able to move it around without it getting lost behind other photos you add or without it getting cut off. So from the Picture Tools menu (which should come up automatically when you add your photo and is highlighted in pink at the top of the Word screen), you will need to choose the "Text Wrapping" option and pick "Through" from that pull down menu.


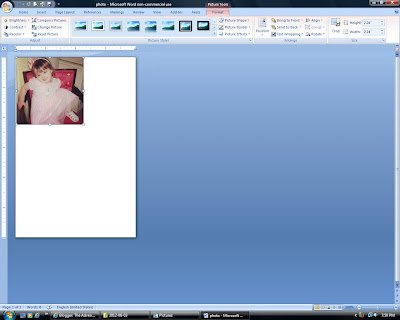
Now you are able to resize and manipulate your photo in order to place it where you like. You can see, I am aiming for a 2x2 inch square for each photo that I will include.


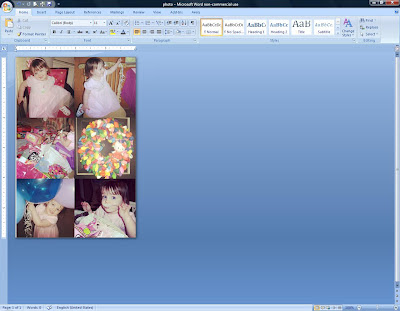
Keep adding your photos following the previous steps. Don't forget to change the "Text Wrapping" option so that your photos can be placed where you like.


Once all of your photos are resized and repositioned, you will have something resembling this.  You can always shrink your photos further, or choose a larger print surface if you would like to leave some white space between each picture.

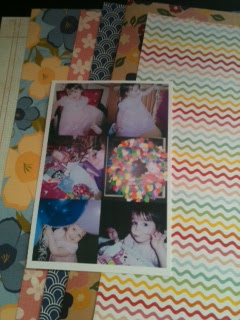
Here's my printed photo.  As you can see, I left a white border around the edge.  Now it's time to pick my papers and put my layout together!


And here's the final layout!

Turning Two
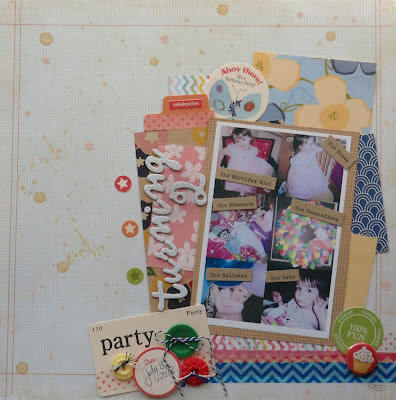
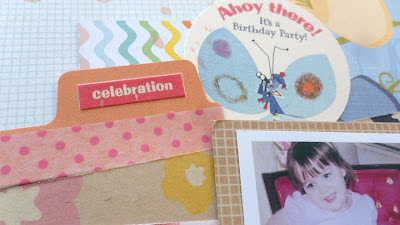
This layout was so much fun!!!  I pulled some old Chatterbox papers out of my stash and paired them with papers from Crate Paper and Pebbles, as well as a few embellishments from October Afternoon's Cake Walk line.  I started out by adding some spray mist to my background page.

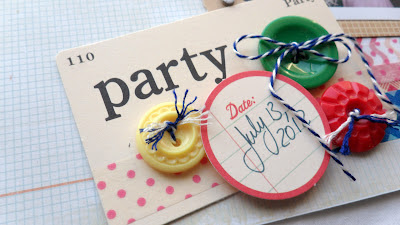
I added some washi tape to this party card from the Cake Walk Miscellany Pack

More of the same washi tape on the tab and a "celebration" sticker.
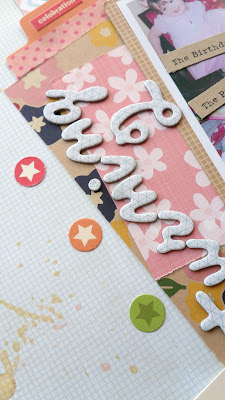
My title runs sideways alongside the photos. I used these great Thickers from American Crafts. I added these star circle die cuts from the Miscellany pack as well.


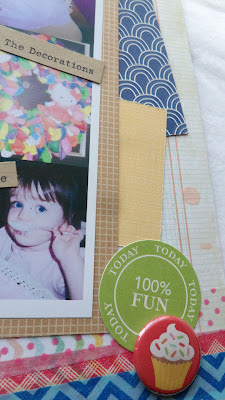
Another sticker from Cake Walk as well as a piece of flare to finish it all off. 


Supplies:  patterned paper - Pebbles, Crate Paper, Chatterbox; stickers, flair, die cuts, buttons, spray ink - October Afternoon; twine - Jillibean Soup; Iwashi tape - Bazzill, Cosmo Cricket, Bella Boulevard; photo and text editing software - Instagram and Microsoft Word 2007

Thanks so much for reading and commenting, everyone!  I hope you enjoyed my very first tutorial.  If there's anything you think I could do to improve future tutorials, or have suggestions or requests for future tutorials, please feel free to email me or leave a comment.


Wednesday, August 8, 2012

Cricut Fears

Hey guys!  Just over a week til I go back to work.  Terrible!  I've really enjoyed having the time off to spend with my girlfriend and family and to work on all kinds of scrapbooky goodness. 

I have another birthday layout to share today! 

Birthday Wishes

This was such a fun layout!  I did something I've been scared of doing for awhile...I actually used the Cricut I got for Christmas last year! 


I'm not sure how well you can see it in this shot, but the background cardstock is this amazing woodgrain finish cardstock by American Crafts. 

I used some old Scenic Route paper to make the background piece of this flower embellishement.  Here I used the Cricut Plantin SchoolBook cartridge to cut the flowers, hearts, and circles out of a variety of patterned papers.

I'm beginning to think that it's impossible for me to create anything anymore without SOME October Afternoon thrown into the mix somewhere. 

The "spread the love" die cut is from the Amy Tangerine Sketchbook line by American Crafts.  I thought it added a nice touch.

Here you can better see that awesome woodgrain cardstock!  I used two different die cuts from Cricut's Graphically Speaking cartridge to create my title.  One was "happy birthday" and the other said "warm wishes".  I just tucked the leftover words away for another project.  I think adding the Doodlebug pearls to the title gave it just a little something extra!

I'm really glad I broke the ol' Cricut out for this layout and since, I've been using my paper scraps to create a barrel (pretty literally, but I'll explain further on another post) full of pre-cut shapes using my cartridges. 

Those of you that are still in the Dark Ages with a Cricut like me (instead of being on the Silhouette bandwagon, which seems to be pretty much everyone!), what are your favorite cartridges?

Supplies:  patterned paper - My Mind's Eye, Jillibean Soup, Scenic Route Paper Co.; crocheted flower - Bella Blvd; die cuts - Amy Tangerine (American Crafts), October Afternoon; flair - October Afternoon; pearls - Doodlebug Designs; sequins - Pebbles; Other -   Cricut cartridges - Graphically Speaking, Plantin SchoolBook


Thank you so much for stopping by today!  Tomorrow I'll be back with a brand new feature and my first EVER tutorial! 

Thursday, June 21, 2012

A Baby and a Pair of Glasses

Hi all!  I'm back with another layout.  This one featuring my precious niece, Ellie.  :)

Glasses

Backstory:  My sister (Ellie's mom) wears glasses.  Somehow, Elle got a hold of them and was attempting to put them on.  She couldn't quite get it figured out.


Okay, so there's all kinds of stuff going on in this layout.  I created this little Chevron type design using an alternating mixture of washis and strips of patterned paper.  I did some machine stitching right through the center. 


Meanwhile, I found these little red epoxy stickers I'd had for years and years, so started out using them all over the page for a kind of confetti effect. Weeeelllllll....it looked like I had blood spatters all over the page, so that just wouldn't do! I went back and covered them up (at least partially) with some legitimate confetti. Much better!


Supplies:  patterned paper - Studio Calico, Crate Paper, Bella Boulevard, Lily Bee Designs; stickers - Crate Paper; letter stickers - American Crafts; buttons - Basic Grey; twine - Divine Twine; flag - Elle's Studio; punch - Jenni Bowlin (Fiskars); washi tape - Bazzill, Cosmo Cricket, Amy Tangerine (American Crafts); other - epoxy stickers, confetti

Thanks for reading!!

Wednesday, April 18, 2012

Yar Matey!

I'm back today with another WDW layout!

A Pirate's Life For Me

This time I went with a kind of piratey theme, since the photographs involved...well...pirates! These are just some silly shots my sister and I took of each other with this pirate dude outside of the World of Disney at Downtown Disney Marketplace. The jailed pirate was located inside the store!

I did an obcene amount of layering on this page, but I'm pretty happy with the result!


Supplies: patterned paper - Crate Paper, Bella Boulevard, Jenni Bowlin, Lily Bee Design, My Mind's Eye, Cosmo Cricket; letter stickers - American Crafts, October Afternoon, Pebbles; brads - American Crafts, My Mind's Eye; washi tape - Bazzill, Amy Tangerine (American Crafts), hambly; kraft labels - Martha Stewart; sticky note labels - K & Co-Smash; chipboard - My Mind's Eye; tags - Jenni Bowlin, Ormolu; other - paper clip

As always, thanks for reading and for your kind comments!